CAUTION: If the service is not created manually or automated including a checklist then the service is created without checklist. So make sure you include checklists in automations/add service manually if necessary!
Last Updated: April 21, 2023
Applies to: All registered users
Services Information is the core of our platform, there data is structure in several tabs and sections:
Also another action which is
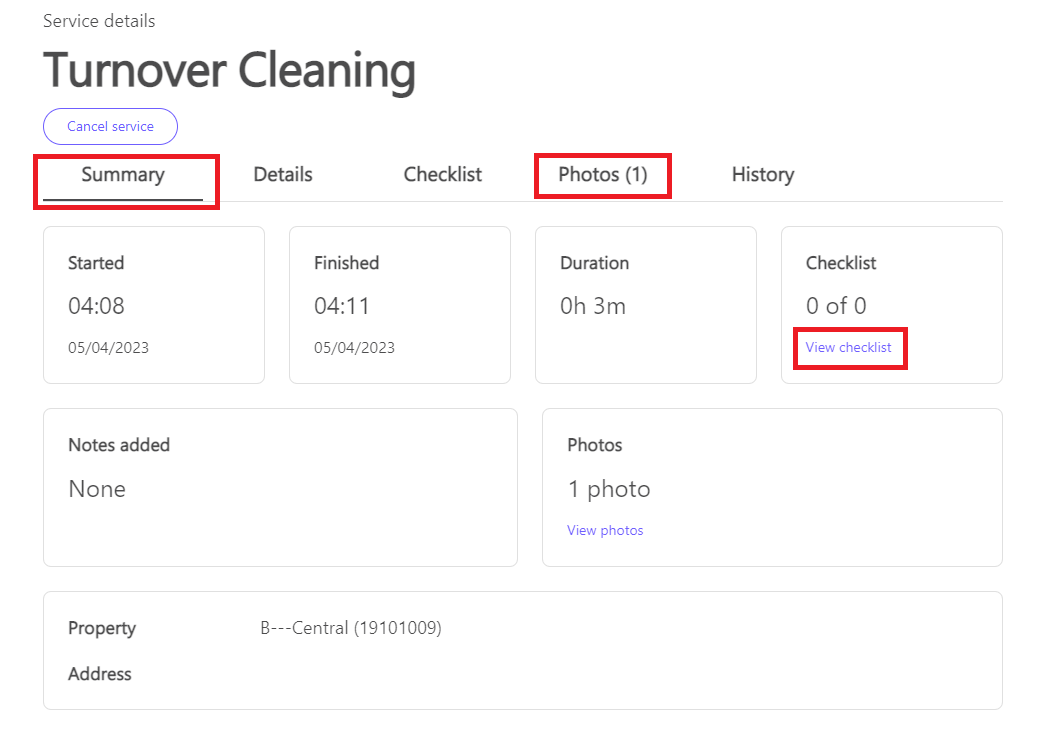
1. How to navigate in Service Summary (Job Summary)
WARNING: This tab inside Service Information is only available for the services with status DONE which means the job was already started and finished
with the following information:
- Time service started
- Time service finished
- Duration
- Photos uploaded
- Checklist of executed tasks (checklist will be prompted directly in the mobile app)
NOTE: When the job is completed the Supervisors and Service Workers will have to check tasks from the Service Checklist in their Doinn Operations mobile app
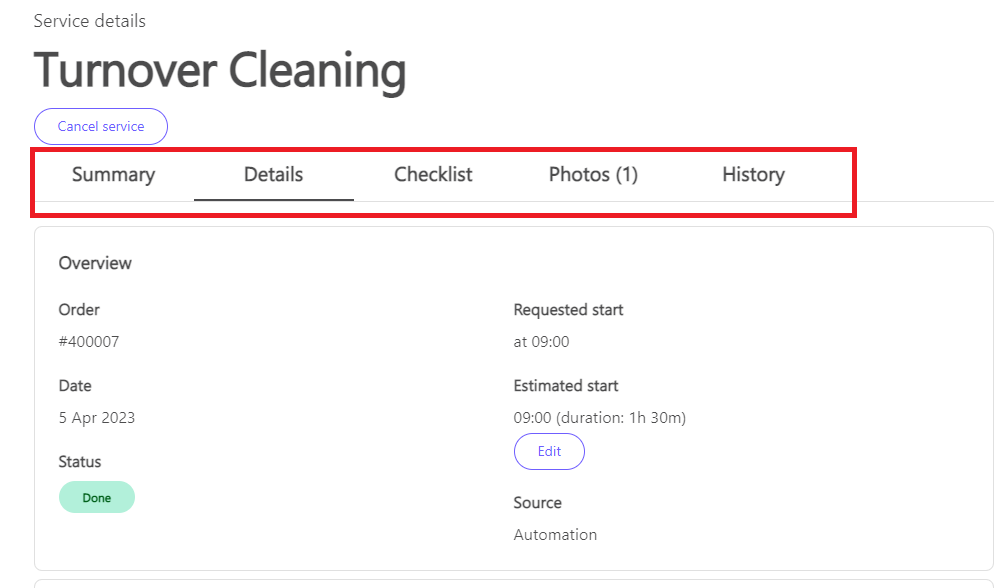
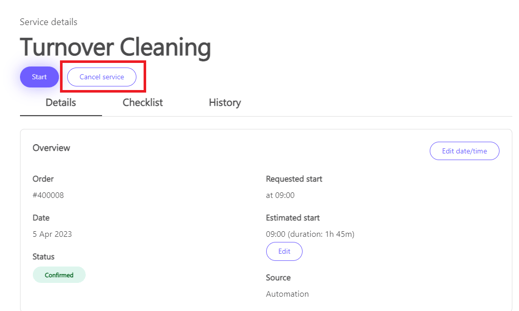
2. How to navigate into Service Details
There are 4 main sections inside service details:
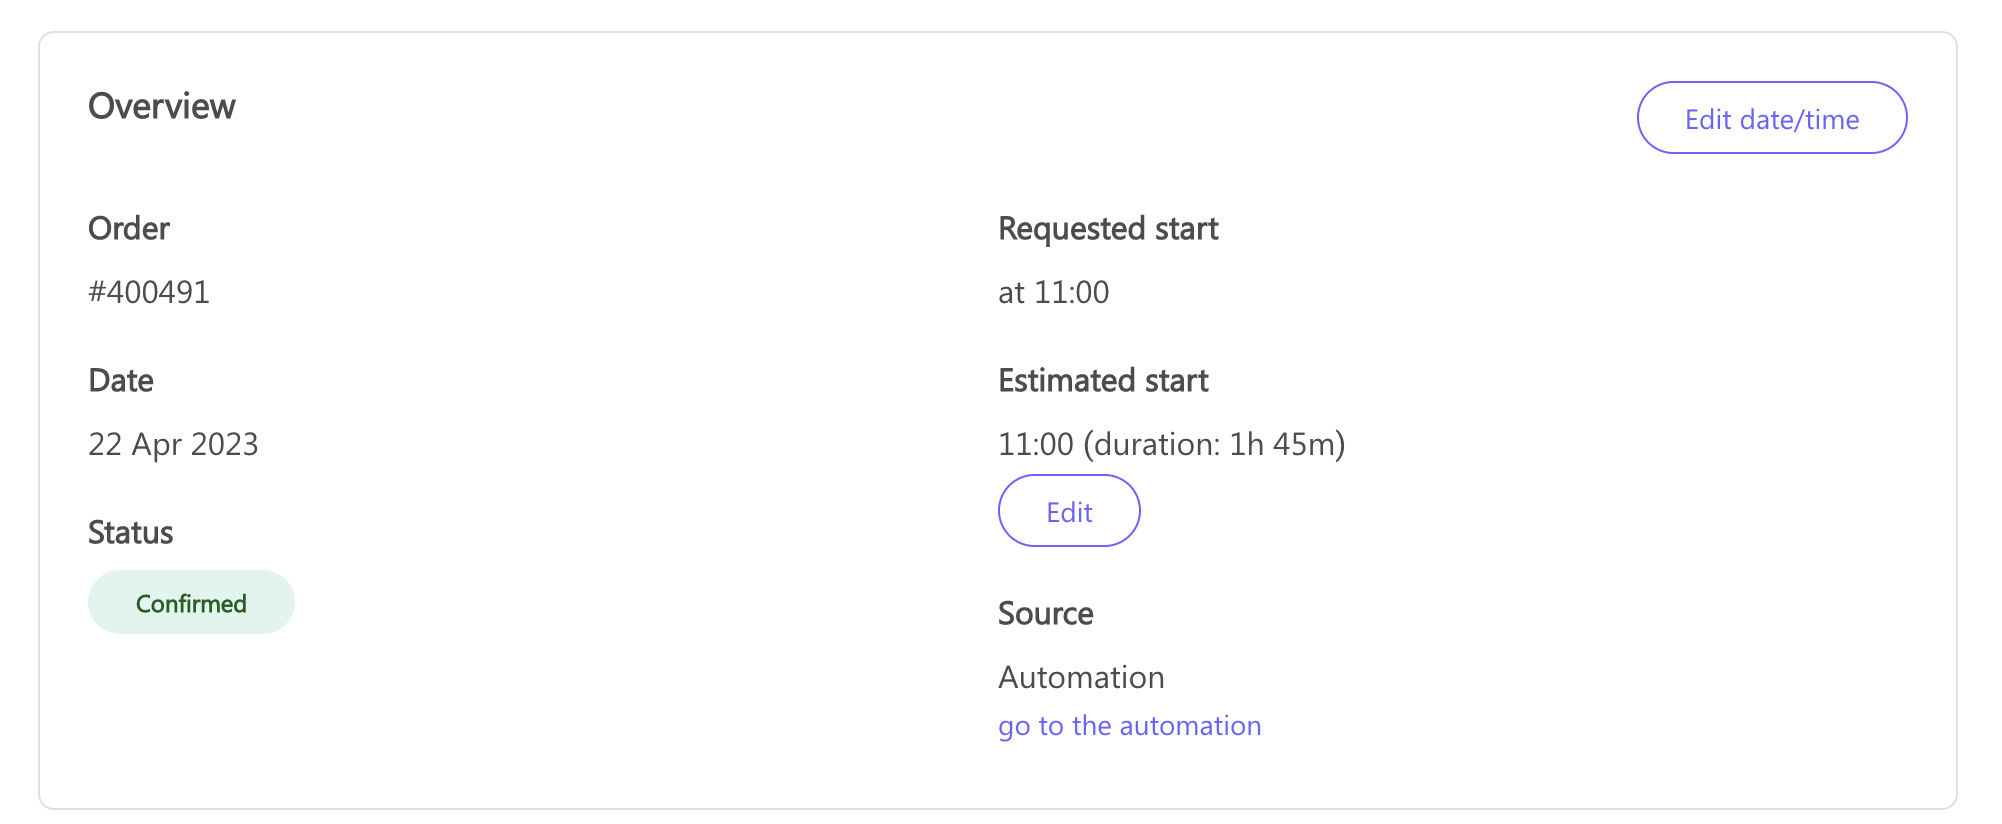
1. Overview
-
- Service Order
- Date - It is possible to change the date by clicking Edit date/time button
-
- Requested Start
- Estimated Start - this is the real start time (update by the service workers/supervisors or service providers). It is possible to change this time directly in the here by clicking button Edit
- Status
- Source (Manual/Automation)
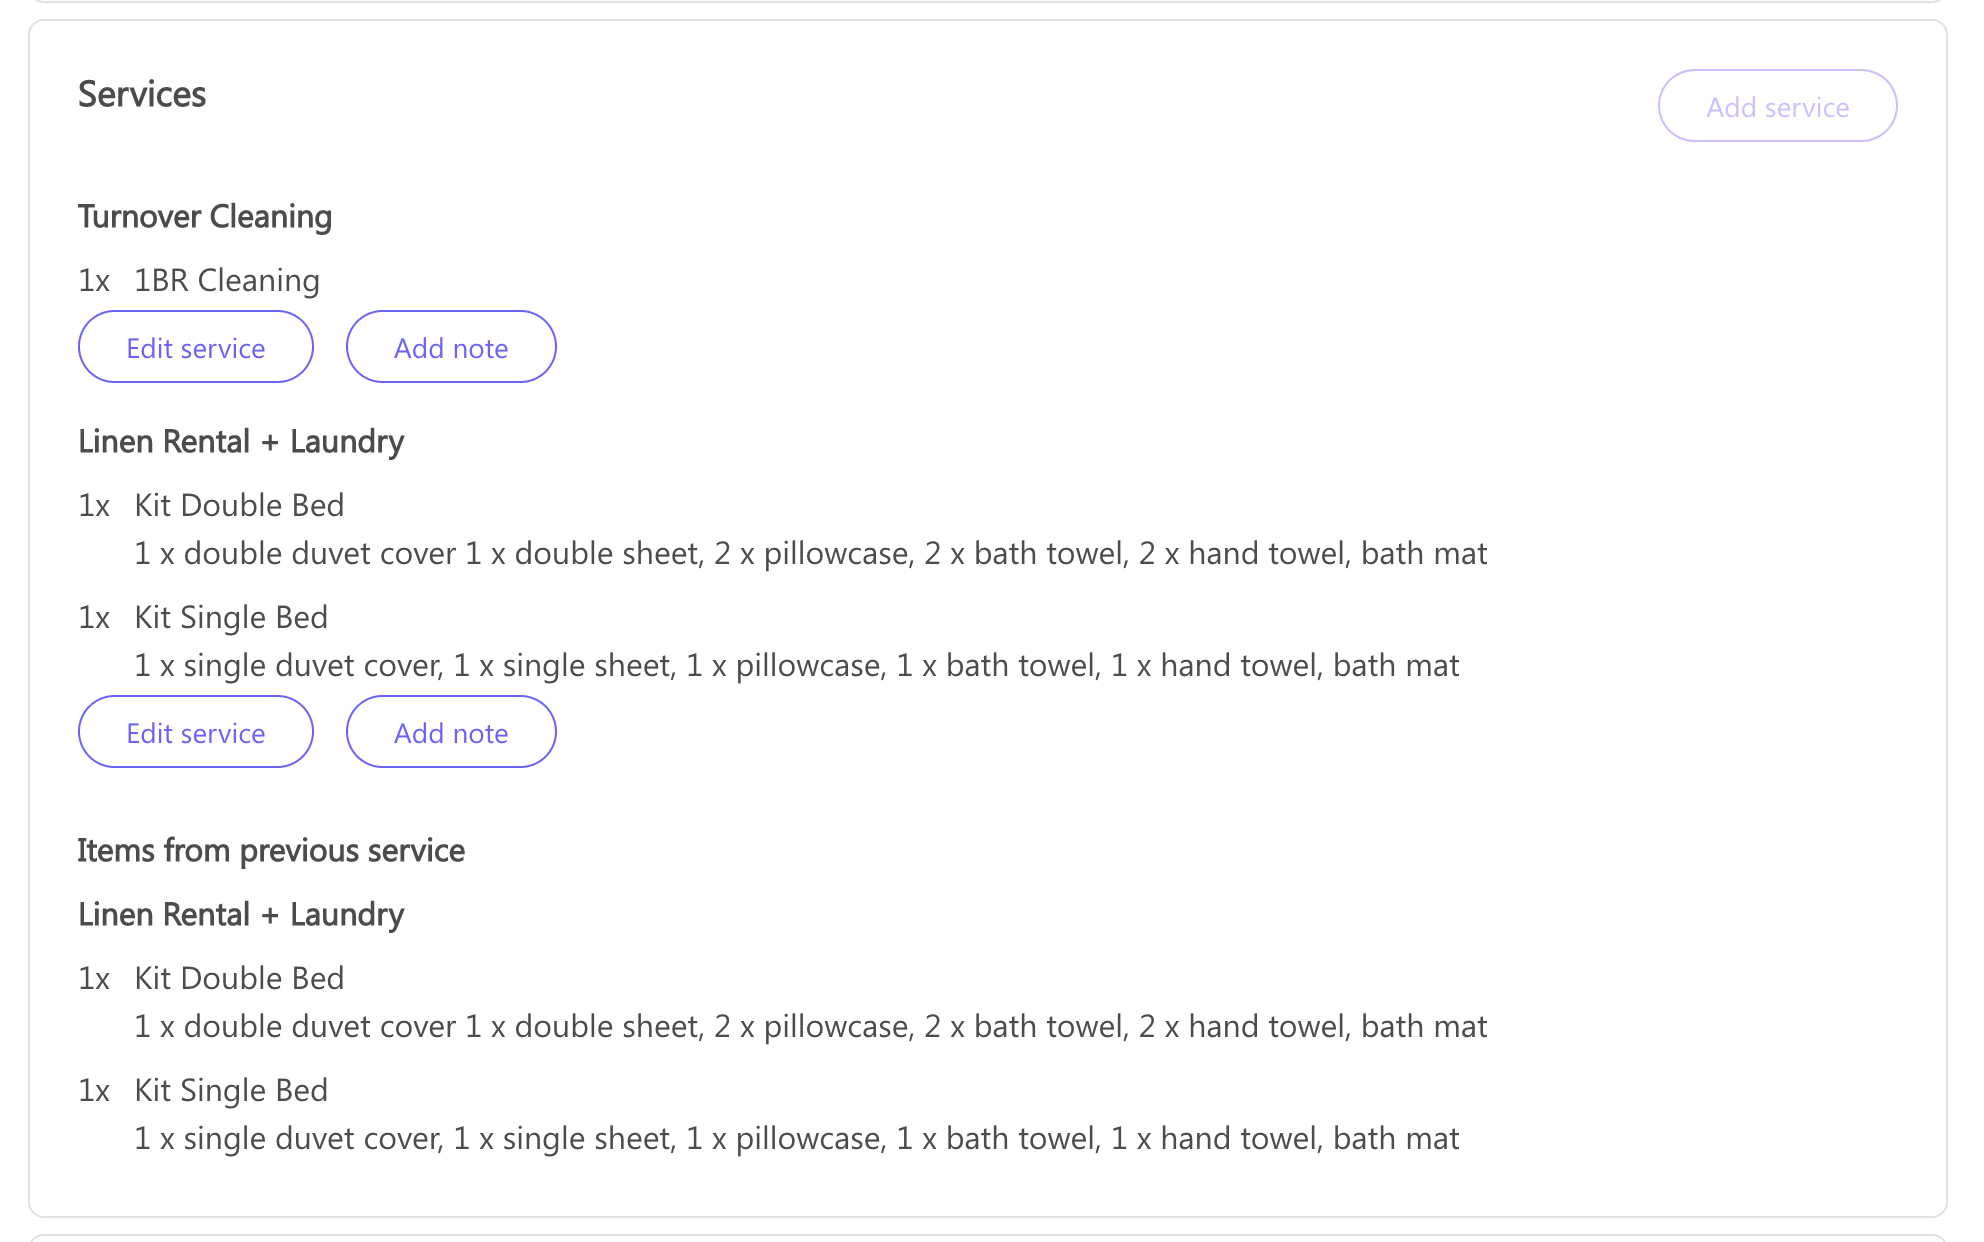
2. Property

-
- Property Name
- Property Address - Here you can open a new tab that open Google Maps directly with the property address
- Property Instructions
-
- Service Type
- Service Number
- Edit Service action
- Add note to Service
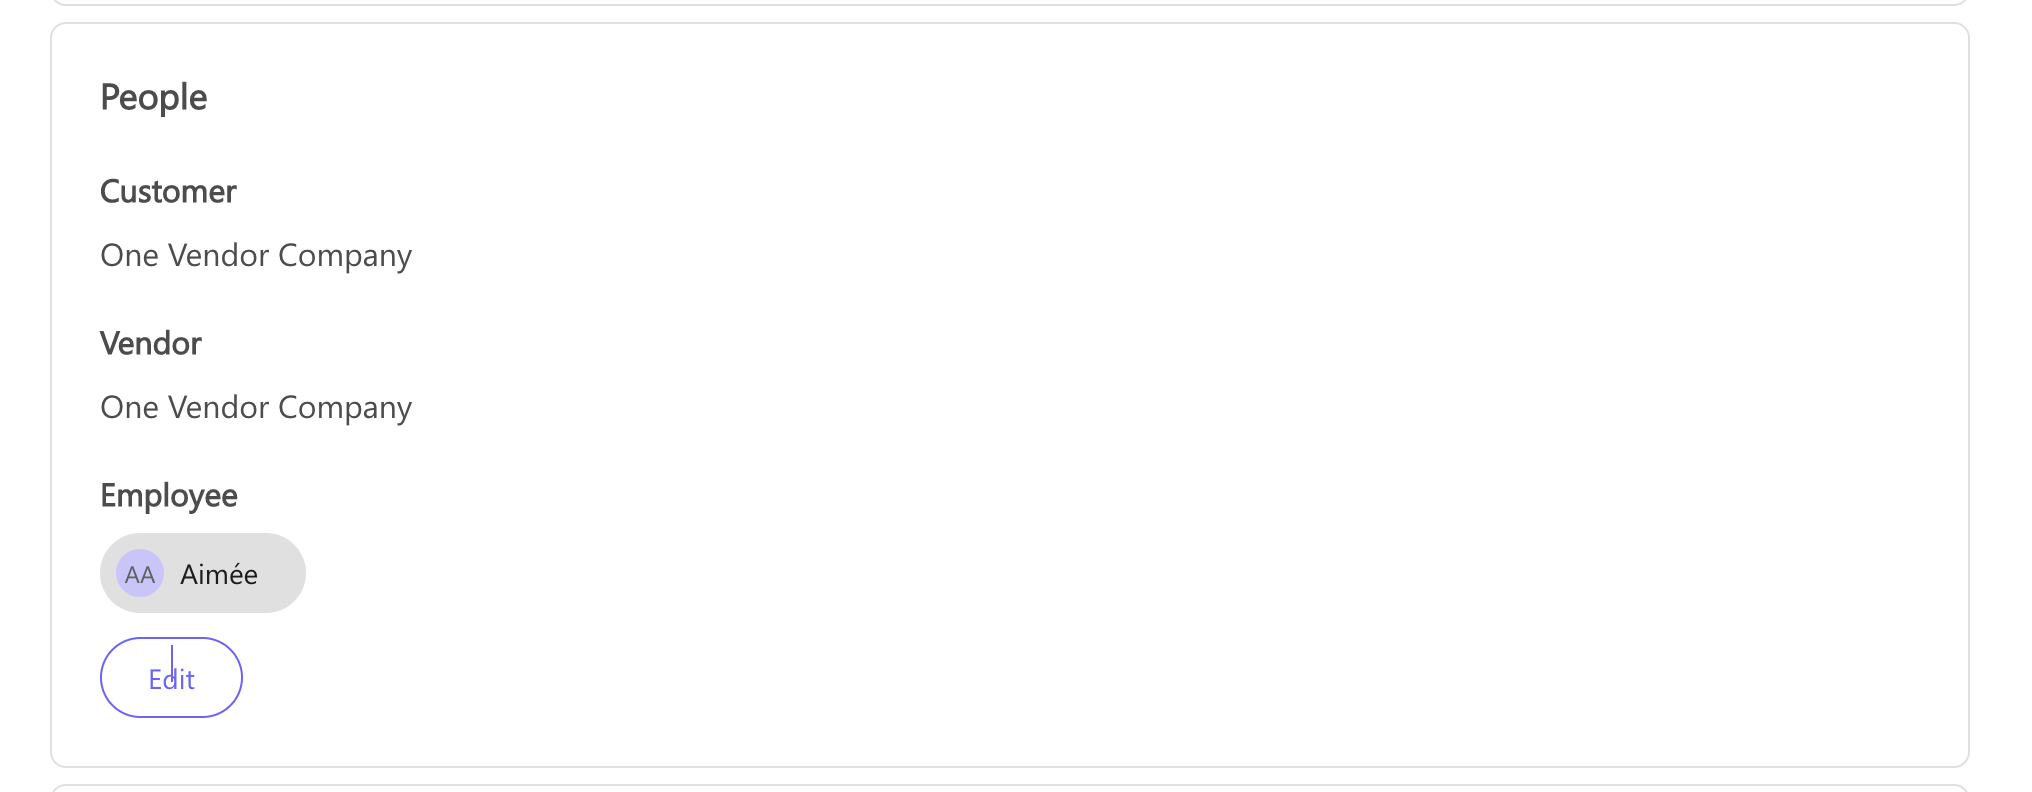
-
- Customer
- Service Provider
- Workers or Teams assigned - it is possible to assign people or teams from here
3. How to navigate into Service Checklist
When a checklist is applied, you will see it displayed in Service details under the tab Checlkist. Click on it to find out all the tasks that requires confirmation. See en example below.
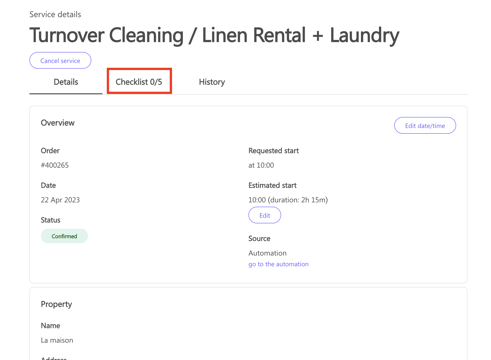

When ending the service, the worker is required to check all the tasks confirming the execution.
CAUTION: If the service is not created manually or automated including a checklist then the service is created without checklist. So make sure you include checklists in automations/add service manually if necessary!
4. How to navigate into Service Photos
To see the picture uploaded after the service has been executed, just click on Photos tab.
Click on it to see the photos upload by the worker.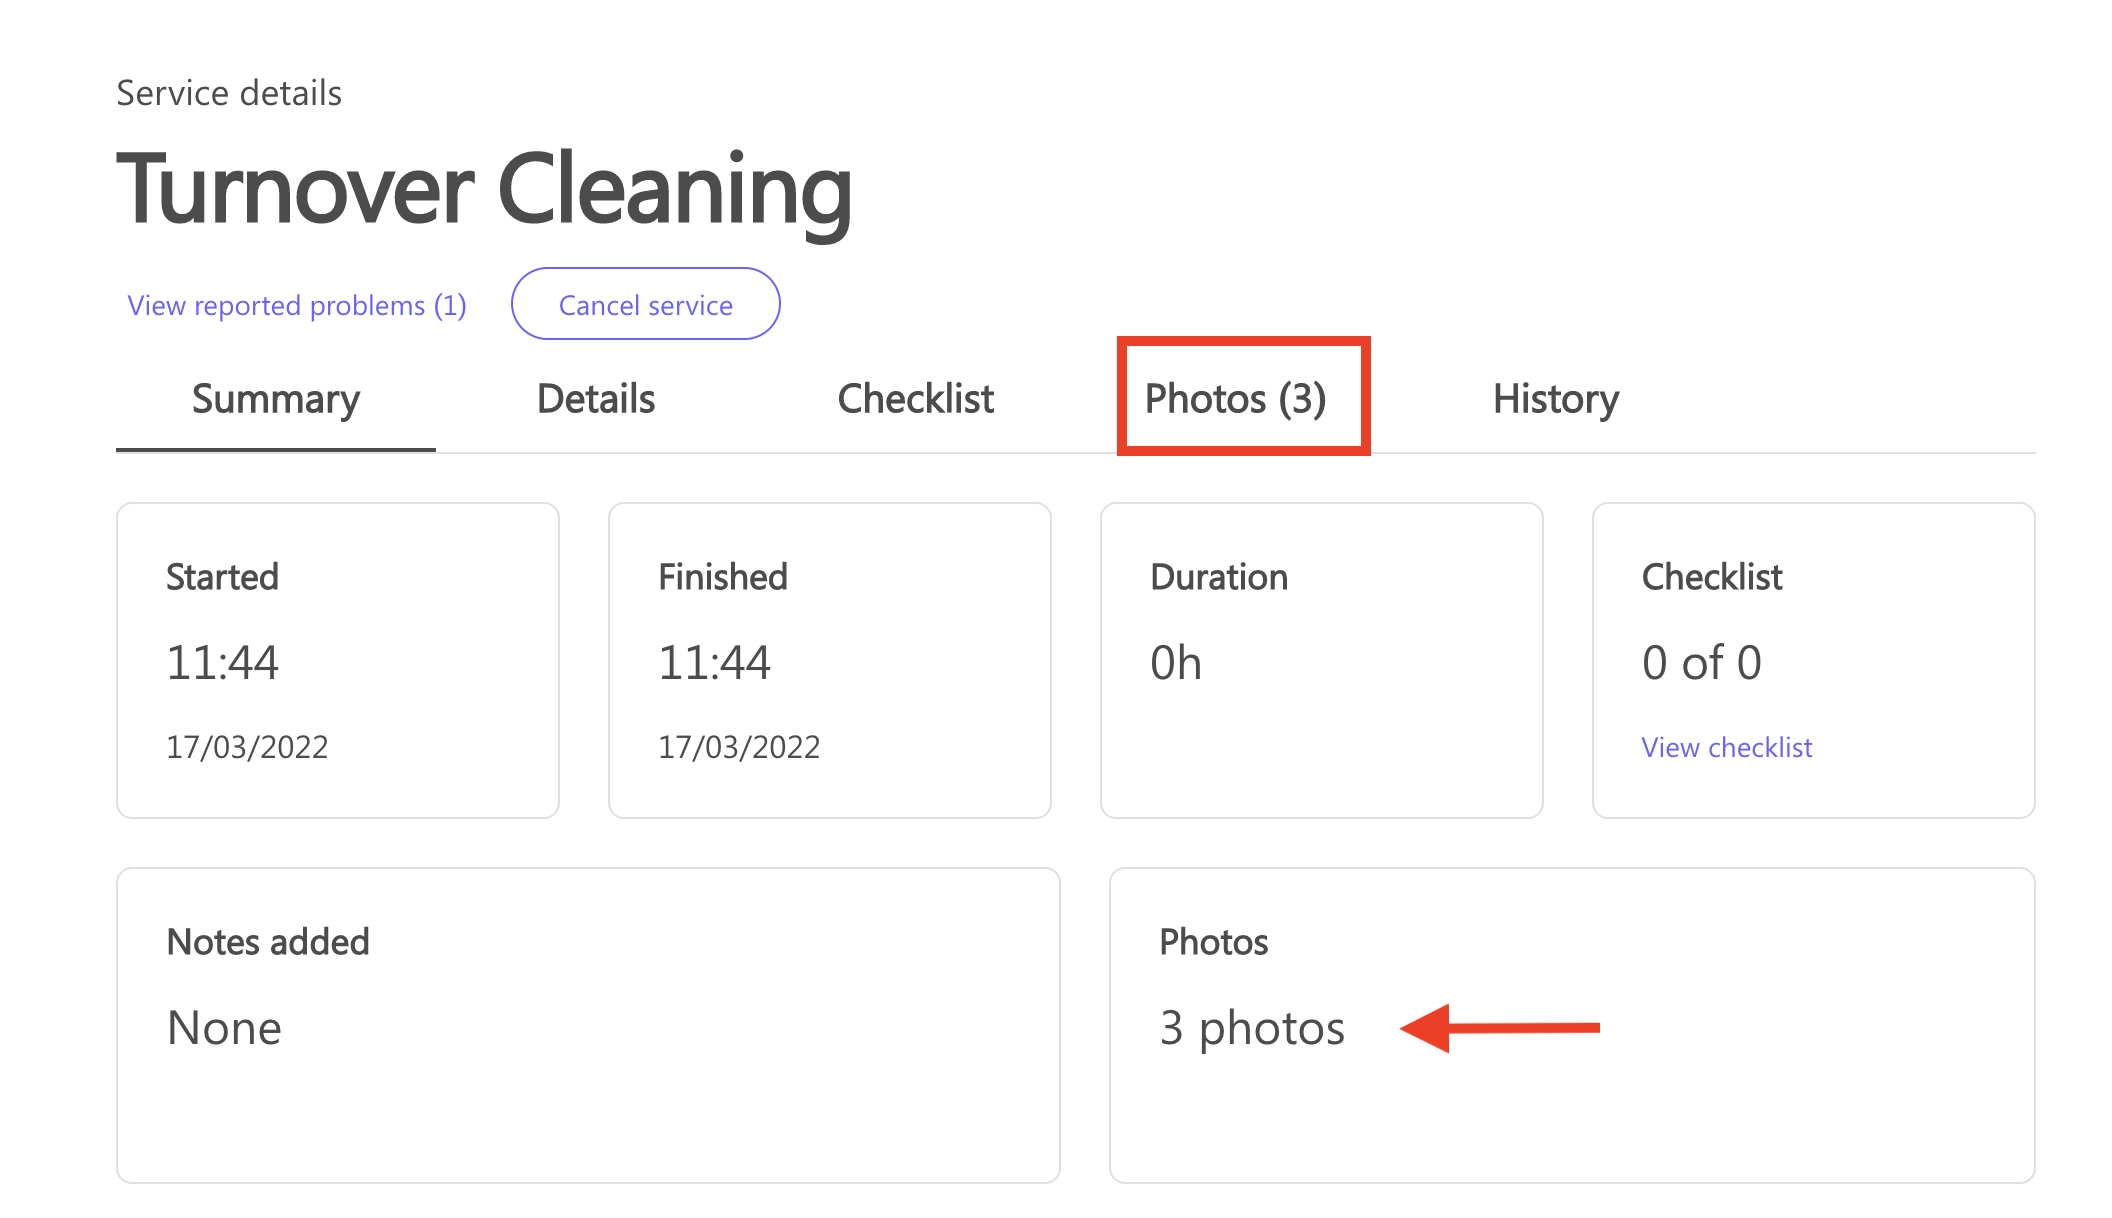
WARNING: This tab inside Service Information is only available for the services with status DONE which means the job was already started and finished
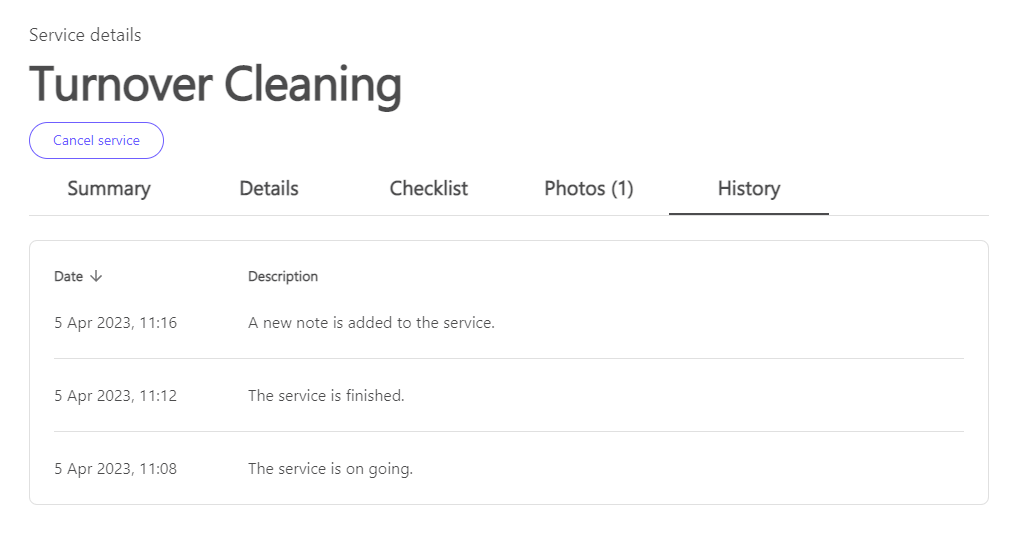
5. How to read the Service History
All new service actions and timestamp will be added into the service history.
Check the History tab as shown in the picture below.
6. Cancel a Service
You can cancel a service directly inside each service details, the steps are:
1. Click Cancel service button
2. The system will ask for a cancelation reason, add note and click Cancel service
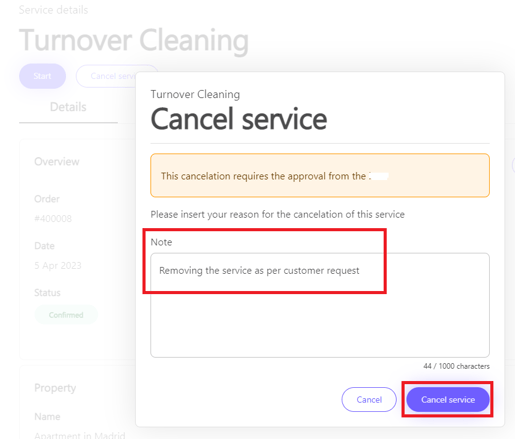
3. The other side (either customer or service provider is external) will receive a service change request to Approve or Refuse
WARNING: Services in pending status are not considered for execution. It is important services are accepted or refused
CAUTION: If you see after some time the external account (customer or service provider) do not accept/refuse the service, please make sure you talk with them to do it.
